All you need to know about Karabiner Elements
From Useless to Useful: Turning Caps Lock into a Shortcut Layer
Ok… I must confess — I’ve barely used the Caps Lock key since I was brought to life.
It’s that one key sitting in the corner, patiently waiting to trick you into typing the wrong password.
On the other hand, using non-QWERTY keyboards can be frustrating — especially when you’re just trying to reach characters like {}, [], () that are located all over your keyboard.
So instead of juggling all these multi-finger shortcuts — the kind that might make you wonder if you need to use your toes as well — there’s Karabiner Elements that will help you remap your keyboard at your convenience collaborating with our poor friend, the Caps Lock key, which has suffered from unemployment since the dawn of time.
In my case here’s the list of issues I was facing:
- The Caps Lock key sits idle, rarely used.
- On AZERTY keyboards, reaching special characters like {}, [], () is unintuitive.
- Standard shortcuts force your hands to leave the home row too often, slowing down typing and navigation.
- Some external keyboards have the Home key switched with the Option (Alt), making it hard to have the exact layout as your internal keyboard.
Meet Karabiner Elements
If you’ve never heard of it before, Karabiner Elements is a free macOS application that lets you remap keys, create custom layers, and automate keyboard behavior — essentially giving your keyboard superpowers.
Here are the four features we’ll focus on:
- Simple remaps: Swap any key for another. Example: Turn Caps Lock into Escape.
- Conditional layers: Hold a key to temporarily change the behavior of other keys.
- Device-specific mapping: Apply different key behaviors depending on which keyboard or device is active. Example: Remap an external keyboard to match your MacBook keyboard.
- Time-based mapping: Make keys behave differently depending on how long they are held. Example: Tap Caps Lock very quickly to send Escape, but hold it to activate your shortcut layer. This way, if you accidentally press it with the intention of using it with another key and release it right after, it doesn’t trigger anything.
How to Install Karabiner-Elements?
Head over to the official Karabiner-Elements website and follow the installation instructions.
My Current Mapping Setup
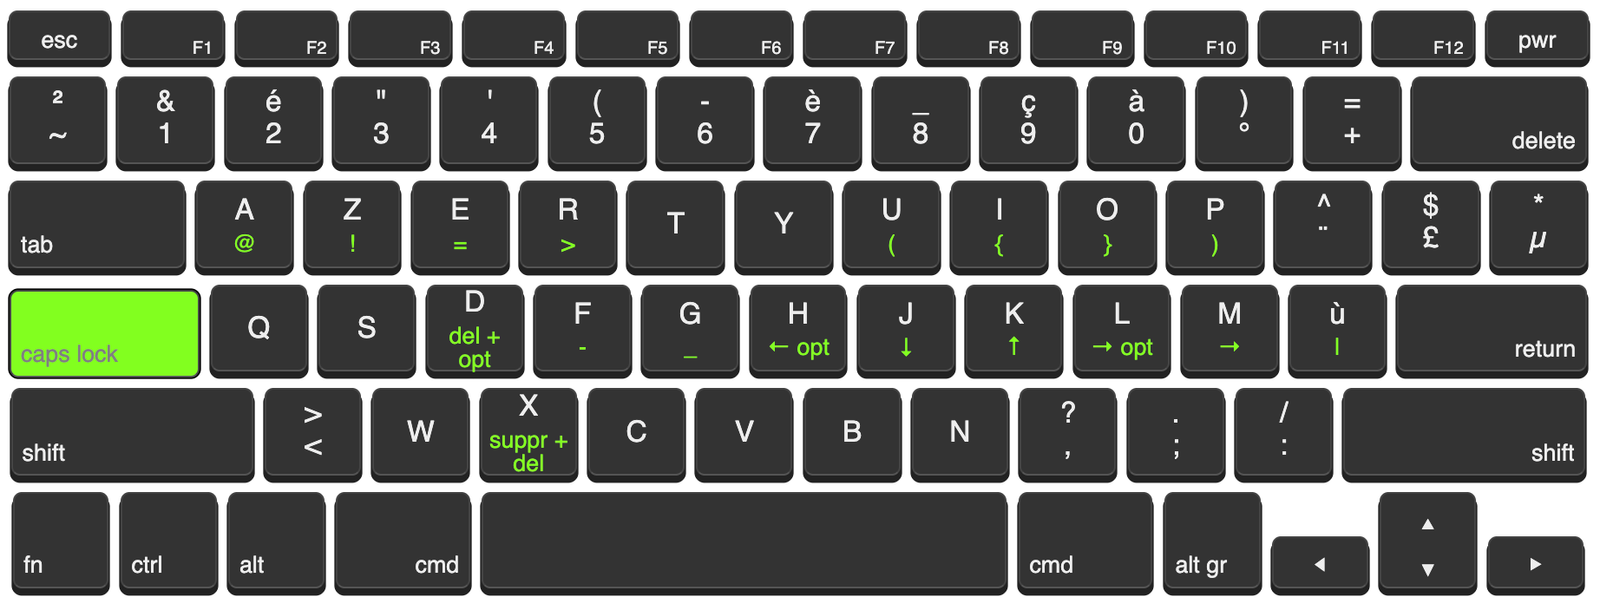
Why using this configuration?
- HJKL: this is VIM navigation style; please do not change the navigation to JKLM. It sounds tempting, but you’ll struggle with every software and plugin using this type of navigation. J is used to go down to the next suggestion, whether on your browser or code editor. HL will allow you to jump whole words. M for right; to accept a command suggestion, use OH MY ZSH.
- UIOP: ({}) it feels really natural; you’ll find yourself using « U » and « I » letters thanks to code completion.
- ZER: !=> remember « E » stands for Equals; it makes writing !==, => intuitive.
- D for Delete + Option: if your cursor is placed at the end of a word, it removes the whole word.
- X is the same as D but removes the whole word after the cursor.
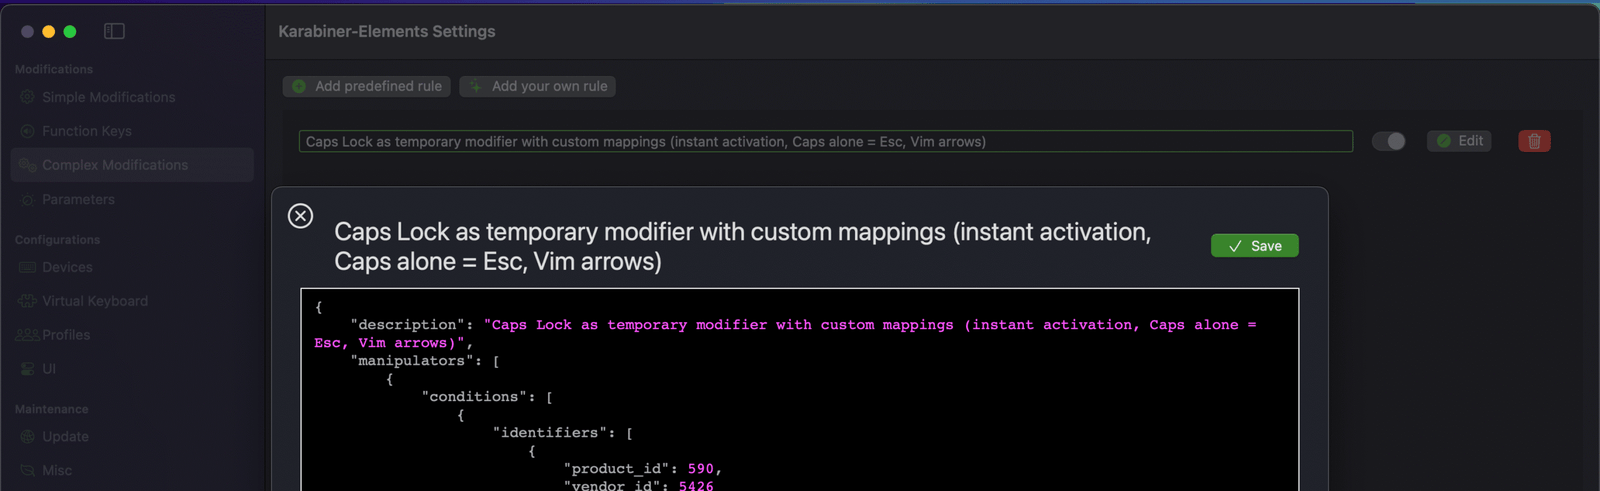
How to import the custom mapping
Once Karabiner-Elements is installed, open it and head to:
Complex Modifications → Add your own rule → Paste my json file if you’re using AZERTY — karabiner.json
If you look to my shortcuts above it looks nothing like the table below, and that’s because Karabiner sees your keyboard as QWERTY by default
| Key (while holding Caps Lock) | Action |
|---|---|
| Caps Lock (tap) | Escape |
| H | Option + Left Arrow |
| J | Down Arrow |
| K | Up Arrow |
| L | Option + Right Arrow |
| U | 5 => ( |
| P | – (Hyphen) => ) |
| R | Shift + Non-US Backslash (|) => > |
| I | Option + 4 => { |
| O | Option + = => } |
| M | Option + 5 => [ |
| , (Comma) | Option + Shift + Hyphen (–) => [ |
| E | = (Equal Sign) |
| F | 6 => – |
| G | 8 => _ |
| ; | Right Arrow => ] |
| ‘ (Quote) | Right Option + 6 => [ |
| D | Option + Backspace (delete previous word) |
| X | Option + Delete Forward (delete next word) |
| S | Right Option + Shift + S |
| Q | Right Option + O => @ |
| W | / (Slash) => ! |
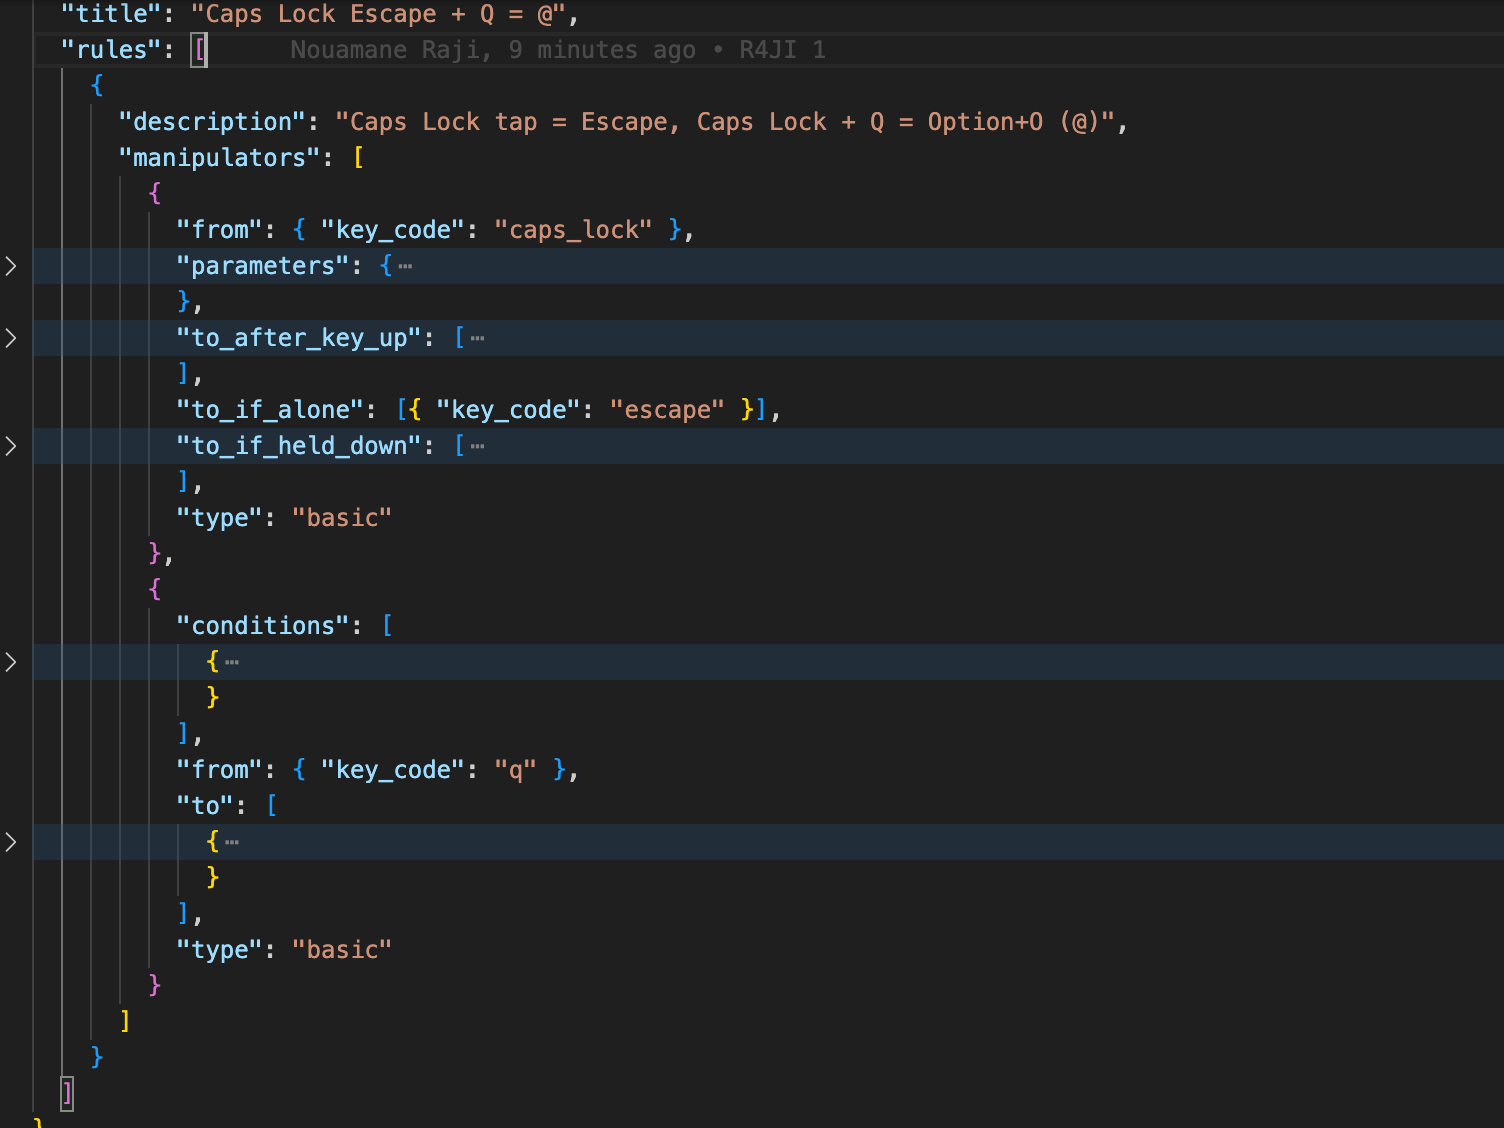
To understand the basics of how this works, let’s focus on this example: Caps key — if the time between pressed and released is under 100 ms, send Escape; and if pressed with « a », it sends « @ ».
- Open Karabiner EventViewer (main interface).
- Start identifying your keys by hitting « a », Caps, Escape, and write « @ » as well.
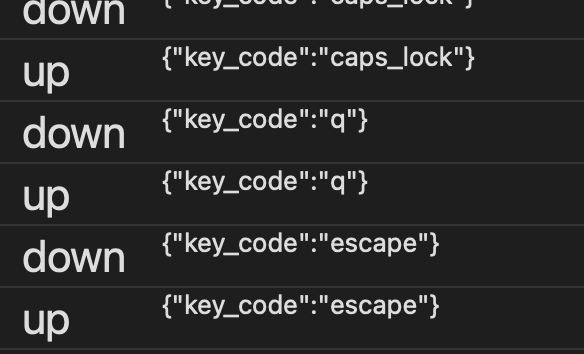
As you can see, hitting « a » in my case triggers the key code « q », and that’s all that matters.
Now, technically speaking, we want:
- caps_lock to trigger Escape if <100 ms
- caps_lock + q to send o + right_option (that’s how I write @ using French layout)
Go to ChatGPT, paste my previous setting, and tell it to follow the same logic.
Here’s the final result: karabiner-example.json
The JSON is self-explanatory. Take a look without going into details; I will tell you everything:
Brief explanation
Caps Lock:
"basic.to_if_alone_timeout_milliseconds": 100
If you hit Caps Lock alone before the 100 ms timeout, it triggers whatever you put in to_if_alone.
"to_if_alone": [{ "key_code": "escape" }]
In this case, pressing Caps Lock alone sends Escape.
"basic.to_if_held_down_threshold_milliseconds": 0
We want the held-down action to trigger instantly, so no threshold is needed. Once held, it sets the variable "caps_lock_held" to 1, and after keyup, back to 0.
Condition: "caps_lock_held" = 1
"from": { "key_code": "q" }
"to": [
{
"key_code": "0",
"modifiers": ["right_option"]
}
]
When Caps Lock is held, pressing Q will send Option + 0 (right option + 0).
Key elements
- Always use EventViewer first — it tells you the actual key_code regardless of your keyboard layout.
- Caps Lock = modifier — hold it down to activate all your mappings, tap it alone for Escape.
- Copy-Paste for JSON — once you know the FROM → TO → WHEN rules, ChatGPT can generate a full JSON snippet for you.
- Conditions — if you want a mapping to only trigger under certain circumstances (like Caps Lock held)
- Experiment freely — AZERTY or QWERTY, it doesn’t matter. EventViewer shows the truth.
- Start small — map 2–3 keys first, test, then expand your setup.
Conclusion
As promised, this is a simple, straight-to-the-point introduction to Karabiner-Elements. You can check whatever you want in their official documentation, or stumble upon interesting features simply by experimenting with settings generated by ChatGPT.
My goal here is to make you work efficiently and set you up as fast as possible — not to help you become an expert in keyboard shortcuts customization.
But if that’s your goal, I wish you all the best of luck!